


How to build a WordPress website using cPanel on Metrotechs
Building a website can be an exciting and fulfilling endeavor. Whether you are a blogger, a small business owner, or simply want to create an online presence for yourself, having a website is essential in today’s digital world.
WordPress is a popular content management system that allows you to easily create and manage your website. In this blog post, I will guide you through the process of building a WordPress website using cPanel on Metrotechs, a powerful web hosting control panel. So grab a cup of coffee, sit back, and let’s get started on your website design journey!
Understanding WordPress
WordPress is like a digital toolbox that’s jam-packed with all the goodies you need to build a website, without needing to learn how to code. Think of it as Lego for websites; you can mix and match pieces to build just about anything you can imagine, from a simple blog spot to lay down your thoughts, to a full-on online store to sell your craft.
What makes WordPress a go-to for so many folks isn’t just that it’s free, which is pretty awesome on its own, but it’s also super user-friendly. It’s got this neat dashboard that lets you call the shots on what your site looks like and how it runs, without having to be some tech wizard. Do you want to post a blog? Add some new pictures? Change how your site looks? All of this can be done with just a few clicks.
Then there’s the endless aisle of themes and plugins. Think of themes like the outfit for your website – they’re what dresses it up and makes it look good. And the best part? There’s a ton to choose from. Whether you’re setting up a blog to share your travel adventures or getting a small business off the ground, there’s something for you.
Plugins are like the special features on your smartphone that make life easier. Need a contact form? There’s a plugin for that. Want to boost your site’s search engine game? Yep, there’s a plugin for that too. Essentially, if you want your site to do something extra, chances are there’s a plugin to make it happen.
But here’s the real kicker – WordPress doesn’t just hold your hand when you’re starting. It grows with you. Started a blog and now want to sell merch? WordPress can evolve into that. The platform is a chameleon this way; it adapts as your online presence or business grows, so you’re not boxed in by the choices you made when you first started.
And for those thinking about setting up their site with WordPress on the Metrotechs network, it’s like putting turbo boosters on your WordPress site. With features like cPanel, managing your website becomes even smoother, giving you more power to manage the backend without needing a tech degree.
So, there it is. Whether you’re sketching out your first blog post in your head or dreaming up the next big online store, WordPress is your launchpad, and it’s ready to fly as high as you want to go.
Getting Started with cPanel on Metrotechs
Now that you have a basic understanding of WordPress, let’s move on to setting up your website with cPanel. cPanel is a web hosting control panel that provides an intuitive interface for managing your website’s files, databases, and other hosting-related tasks. cPanel access is part of our web hosting packages, so make sure you have cPanel access before proceeding.
If you do not have a cPanel account, you can sign up for cPanel here — Get cPanel
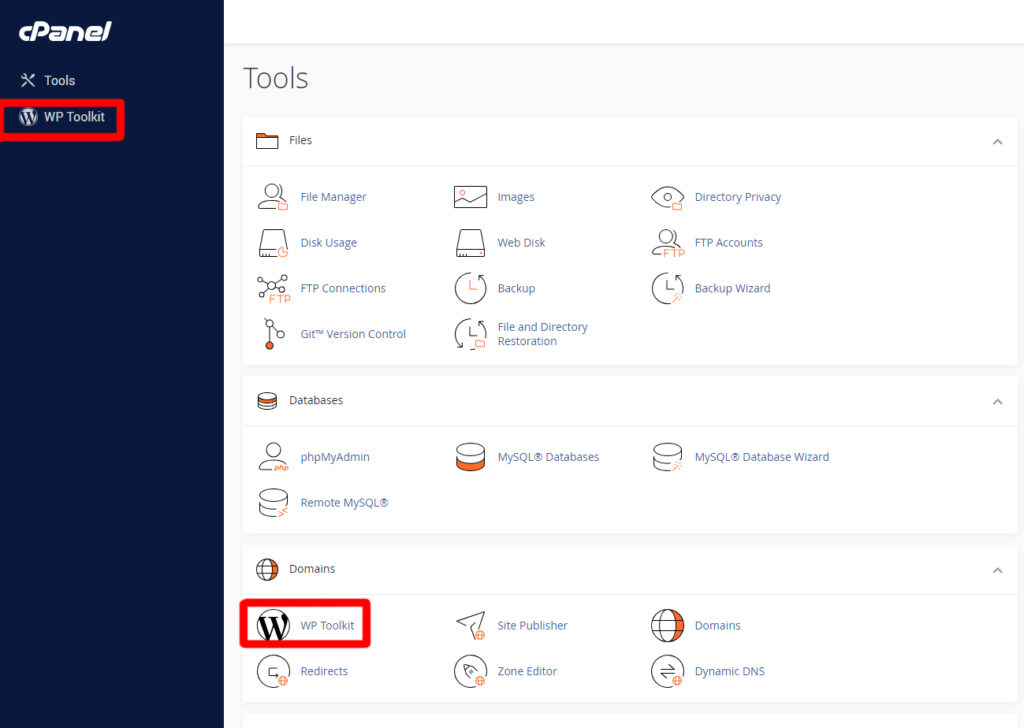
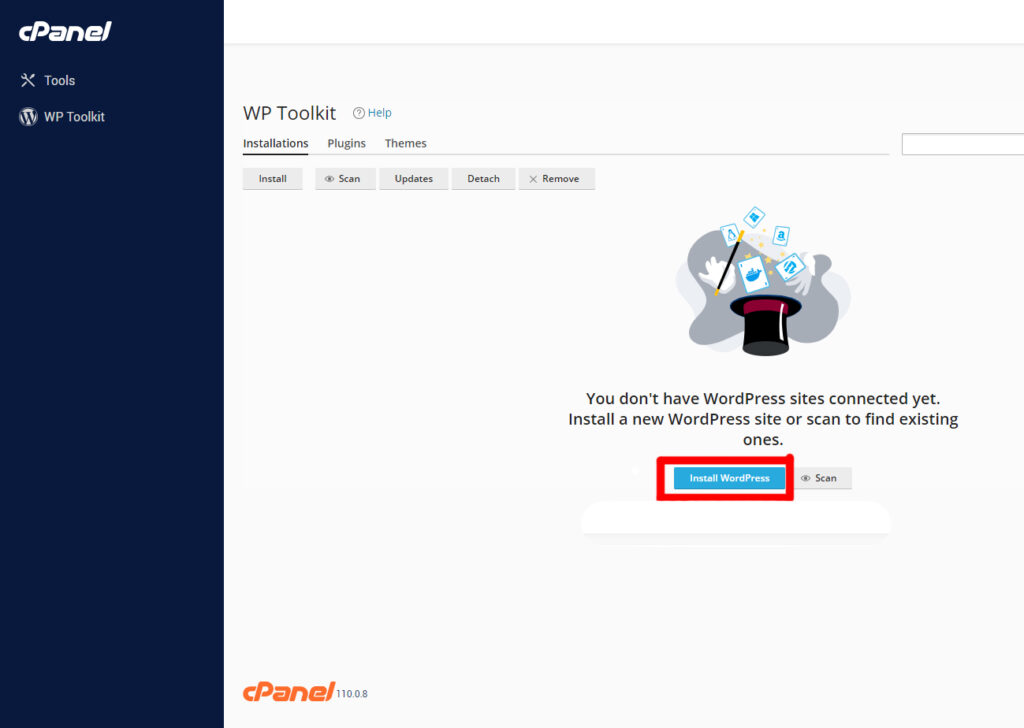
Now it’s time to install WordPress. To get started, log in to your cPanel account. Once you’re logged in, navigate to the left side of the control panel and click on “WP Toolkit“. This will take you to the WordPress Manager interface, where you can install and manage your WordPress websites.
Click on the “Install WordPress” button to begin the installation process.
You will be prompted to enter some basic information, such as your website’s name, description, and administrator credentials. Random account info will be added automatically, but it is recommended to add your own info. Fill in the required fields and click on the “Install” button at the bottom of the page to start the installation.
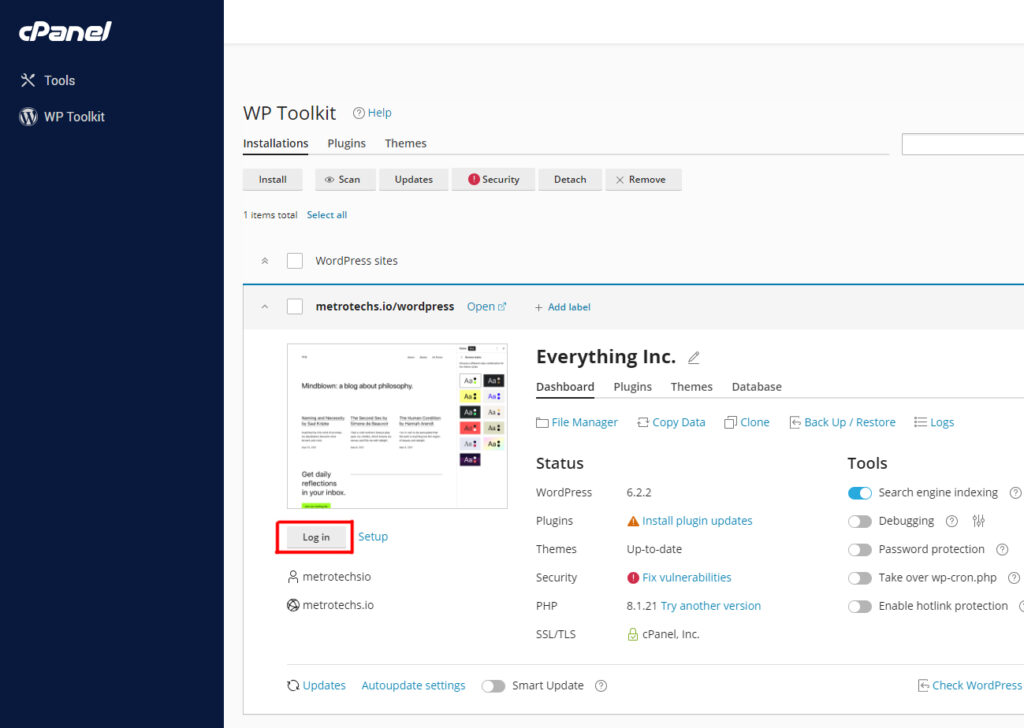
Once you click on the install button, cPanel will automatically install WordPress on your hosting account, and you will be provided with the login details once the installation is complete.

Choosing a Theme and Customizing Your Website
Now that you have successfully installed WordPress on your cPanel account, it’s time to choose a theme and customize your website. WordPress offers a wide range of free and premium themes that you can use to give your website a unique look and feel.
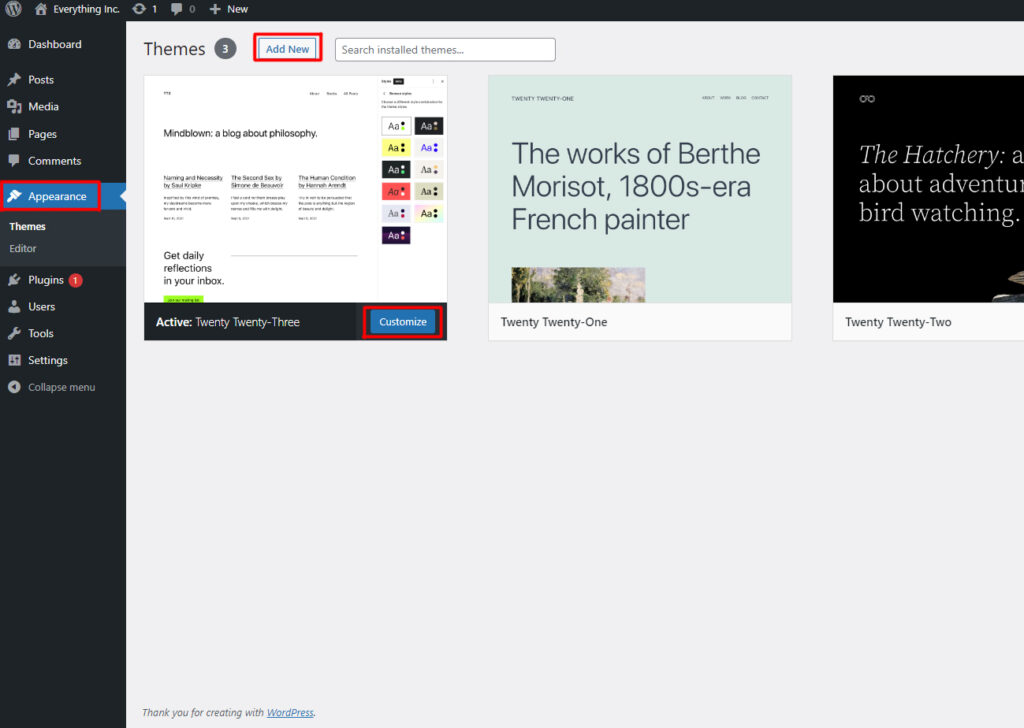
To access the themes section, log in to your WordPress dashboard and navigate to the “Appearance” tab.
Click on “Themes” to view the currently installed themes. You can also click on the “Add New” button to install a new theme. Install the one you like by clicking on the “Install” button. Once the theme is installed, click on the “Activate” button to make it live on your website.
After activating your theme, you can customize it to match your brand identity. WordPress provides a powerful built-in customizer that allows you to modify various aspects of your website’s design, such as colors, fonts, layouts, and more.
To access the customizer, go to the “Appearance” tab and click on “Customize“. From there, you can easily make changes to your website’s design by using the intuitive interface. Experiment with different options until you are satisfied with the look and feel of your website.
Adding Content and Functionality
Adding New Pages
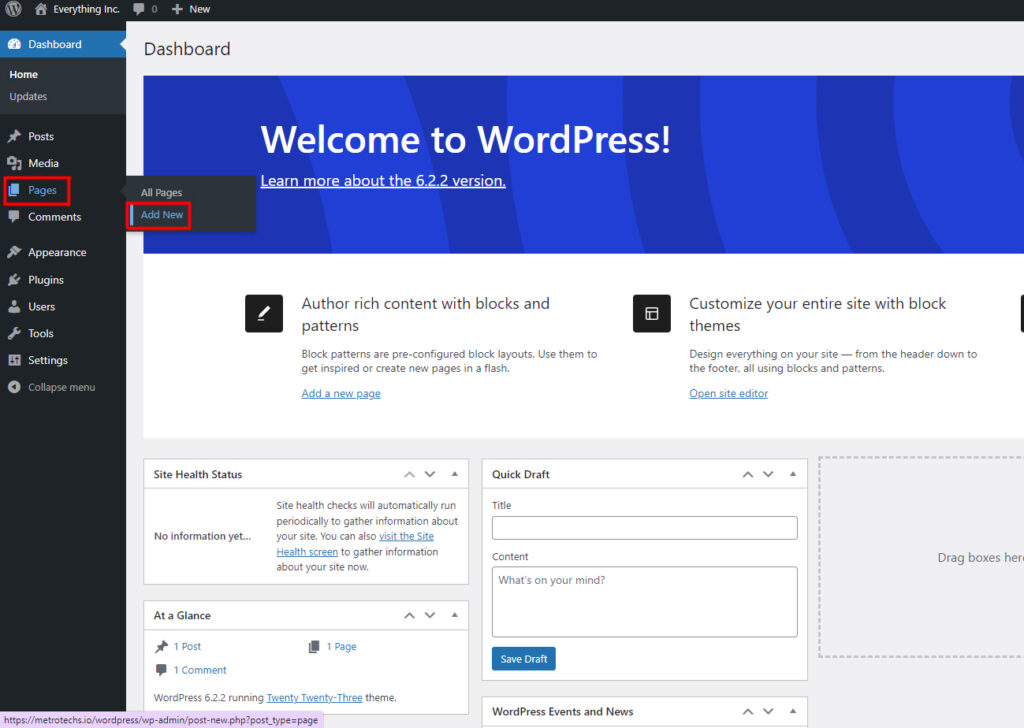
Now that your website looks great, it’s time to add some content and functionality. WordPress makes it easy to create and manage your website’s pages, posts, and media. To create a new page, hover your mouse cursor over the “Pages” tab in your WordPress dashboard and click on “Add New“. You can give your page a title, add content using the built-in editor, and customize its settings. Once you’re done, click on the “Publish” button to make your page live on your website.
Adding New Blog Posts
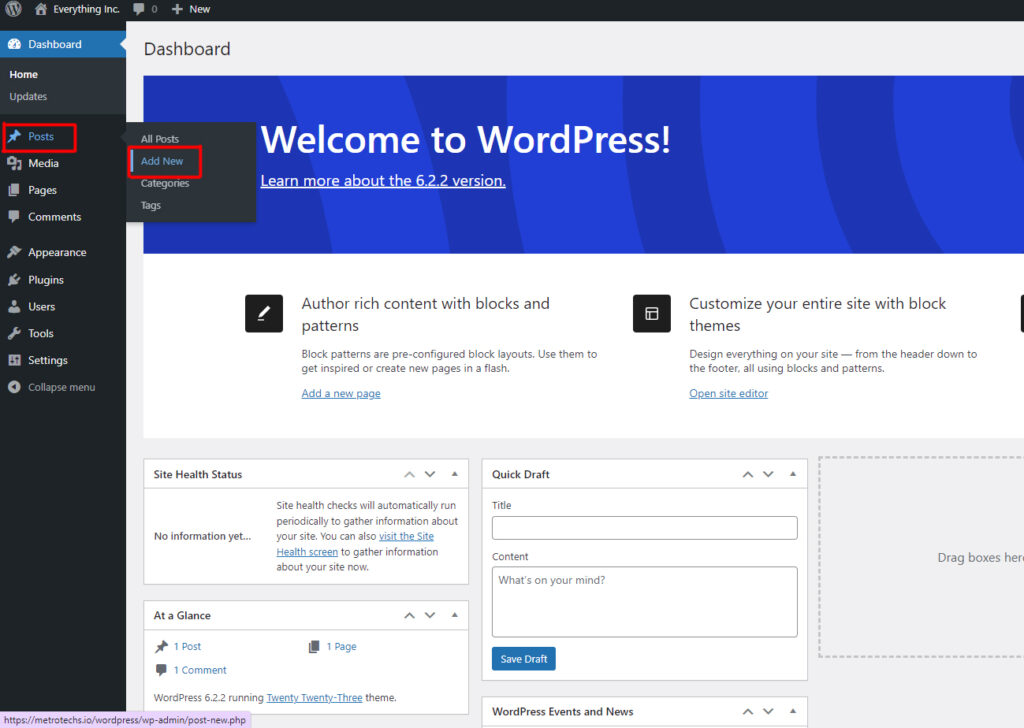
In addition to pages, WordPress allows you to create blog posts to regularly update your website with fresh content. To create a new post, hover your mouse cursor over the “Posts” tab in your dashboard and click on “Add New“. Similar to pages, you can add a title, content, and customize the settings of your blog post. Don’t forget to click on the “Publish” button to make your post visible to your website visitors.
Adding New Plugins
To enhance the functionality of your website, WordPress offers a wide range of plugins. Plugins are additional pieces of software that you can install and activate on your WordPress website to add new features and functionality. Whether you want to add a contact form, create a membership site, or optimize your website for search engines, there is a plugin for almost everything.
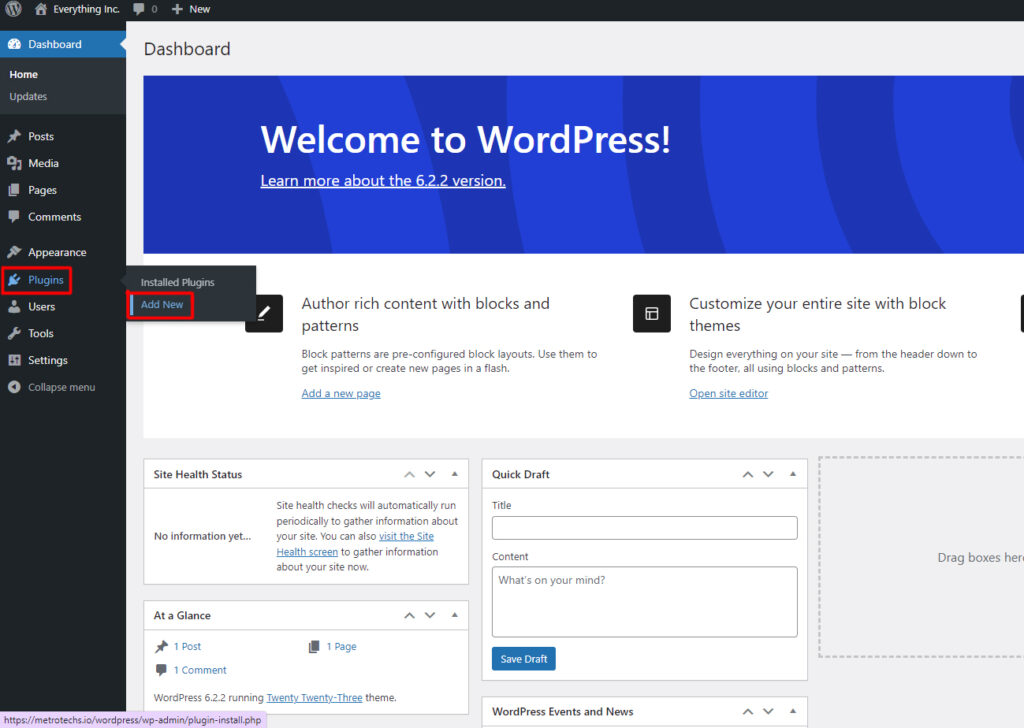
To install a plugin, hover your mouse cursor over the “Plugins” tab in your dashboard and click on “Add New“. You can search for plugins by keyword or browse through the available options. Once you find the plugin you want to install, click on the “Install Now” button, and then activate it to start using its features.
Optimizing Your Website for Performance and Security
Now that your website is up and running, it’s important to optimize it for performance and security. A slow and insecure website can negatively impact your user experience and search engine rankings. Fortunately, WordPress provides several tools and techniques to help you optimize your website.
Install Cache Plugin
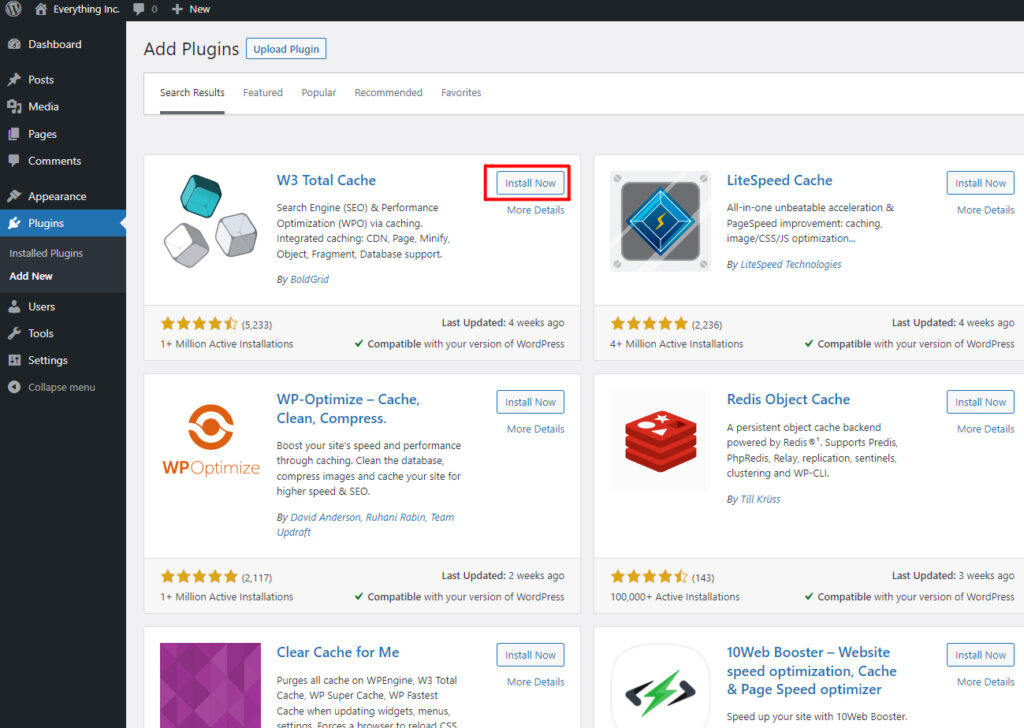
To improve your website’s performance, consider using a caching plugin. Caching plugins create static versions of your web pages, which are served to your visitors instead of dynamically generating the pages each time. This can significantly reduce the load on your server and improve the speed of your website. I recommend using W3 Total Cache. Using the plugin installation instructions above, search for W3 Total Cache and click on “Install Now“.
In terms of security, it’s important to keep your WordPress installation, themes, and plugins up to date. Outdated software can be vulnerable to security breaches, so make sure to regularly check for updates and install them as soon as they are available.
Install Security Plugin
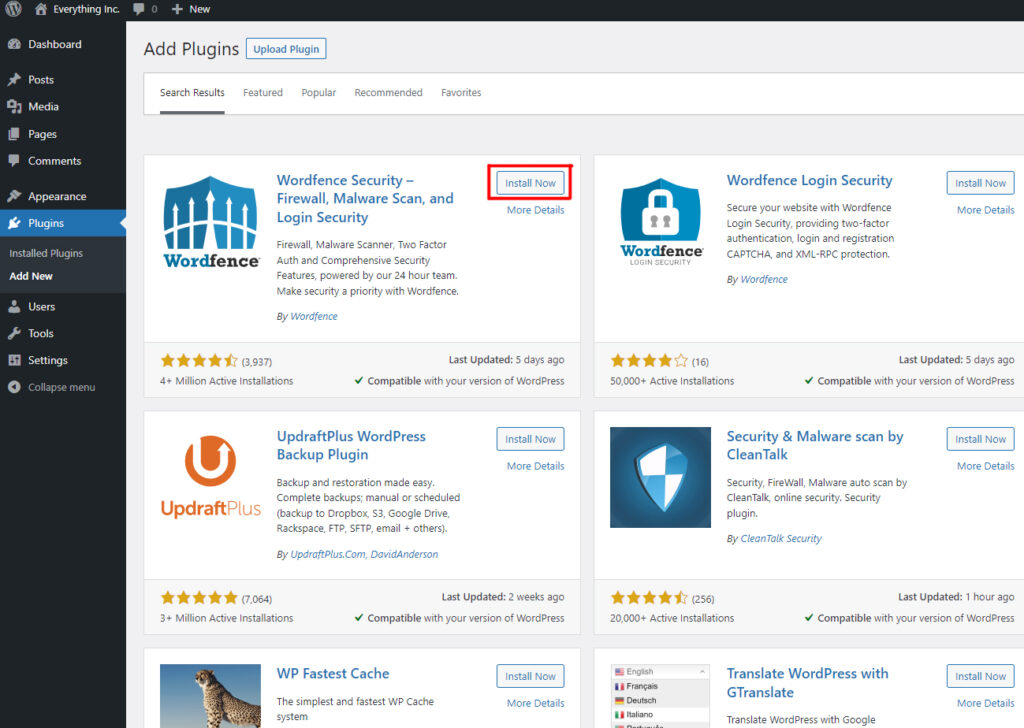
Additionally, consider using a security plugin to further protect your website. Security plugins can scan your website for vulnerabilities, block malicious attacks, and provide other security measures. I recommend using WordFence. Using the plugin installation instructions above, search for WordFence and click on “Install Now“.
Launching Your Website
Congratulations! You have successfully built your WordPress website using cPanel. Now it’s time to launch it and share it with the world. Before going live, take a moment to review your website and make sure everything looks and works as intended.
Check all your pages, posts, and plugins for any errors or issues. Test your website on different devices and browsers to ensure proper responsiveness. Once you are satisfied with your website, it’s time to remove any “Coming Soon” or “Under Construction” pages and make your website accessible to the public.
To launch your website, you need to point your domain name to your cPanel hosting account. This process involves updating your domain name’s DNS settings to point to our nameservers. The exact steps may vary depending on your domain registrar, so make sure to follow the instructions provided by them. The Metrotechs DNS records are ns1.metrotechs.host and ns2.metrotechs.host.
If you purchased your domain name through Metrotechs, your DNS records are already pointed to the platform and your site is already accessible online.
If you do not want to use the Metrotechs DNS, you can point your A Record to the IP address of your web hosting server.
Once your domain name is properly configured, it may take some time for the changes to propagate across the internet. This process is known as DNS propagation, and it can take anywhere from a few minutes to 48 hours. After the propagation is complete, your website will be accessible to anyone who visits your domain name.
Conclusion
Building a WordPress website with cPanel is a straightforward process that allows you to create a professional-looking website without any coding knowledge. By following the steps outlined in this blog post, you can set up your website, choose a theme, customize its design, add content and functionality, optimize it for performance and security, and finally launch it for the world to see.
Remember to regularly update your WordPress installation, themes, and plugins, and take advantage of the vast WordPress community for support and inspiration. So what are you waiting for? Start building your dream website today!