Metrotechs
Take your online presence to the next level with Metrotechs.
Frisco Texas
945-217-0131
Arlington Texas
817-612-3575
Subscribe To Stay In The Loop
By subscribing, you agree to our
privacy policy.
Home
About
News & Insights
Our Commitment
Solutions
Challenges We Tackle
Smarter Solutions
eCommerce Development
eCommerce SEO
AI Workflow Automation
Local Business Web Design
Local Business SEO
AI & Machine Learning
Fractional CTO
Website Hosting
Industries Covered
Wholesale & Manufacturing
Food & Beverage
Health & Wellness
Pet Products & Services
Home & Garden
Hobby & Specialty Goods
Subscription-Based Businesses
Beauty & Personal Care
View All Industries
We have a Dynamic Team Ready To Solve Serious Business Problems
Let’s Talk
Let’s Talk
Resources
Innovative Thinking
Search Engine Optimization
19 Aug, 2025
SEO Won’t Make You Famous—It Makes You Findable
Read More
E-Commerce
9 Jul, 2025
E‑commerce‑Only Growth: Tech Blueprint for 8‑Figure DTC Brands (2025 Guide)
Read More
Products
AI Brand Builder
Social Toolbox
Ecwid2Woo
Conference Summit
Portfolio
Contact
Launchpad
Launchpad
How to connect your WordPress website to Metrotechs Brand Builder.
Home
News
How to connect your WordPress website to Metrotechs Brand Builder.
Configure WordPress Integration
Getting started with WordPress Integration.
How to Configure WordPress:
Step 1:
Log in to your WordPress
admin dashboard
using your credentials.
Step 2:
Disable 2FA
in case if you have turned it on in your settigs.
Step 3:
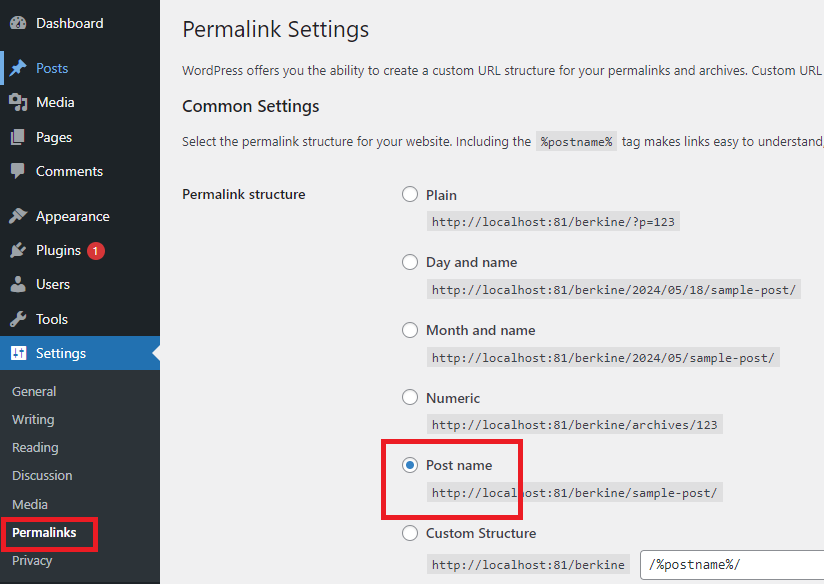
Go to
Settings – Permalinks
page and select postname.
Step 4:
Go to
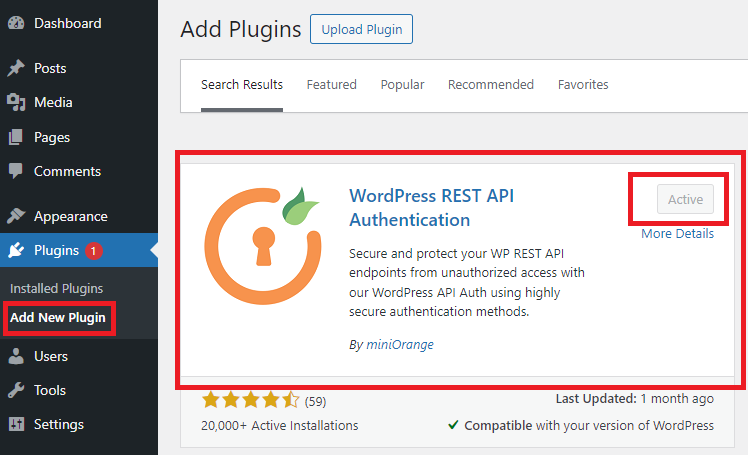
Plugins – Add New Plugin
and install
WordPress REST API Authentication
, make sure that after installation it is
activated
.
Step 5:
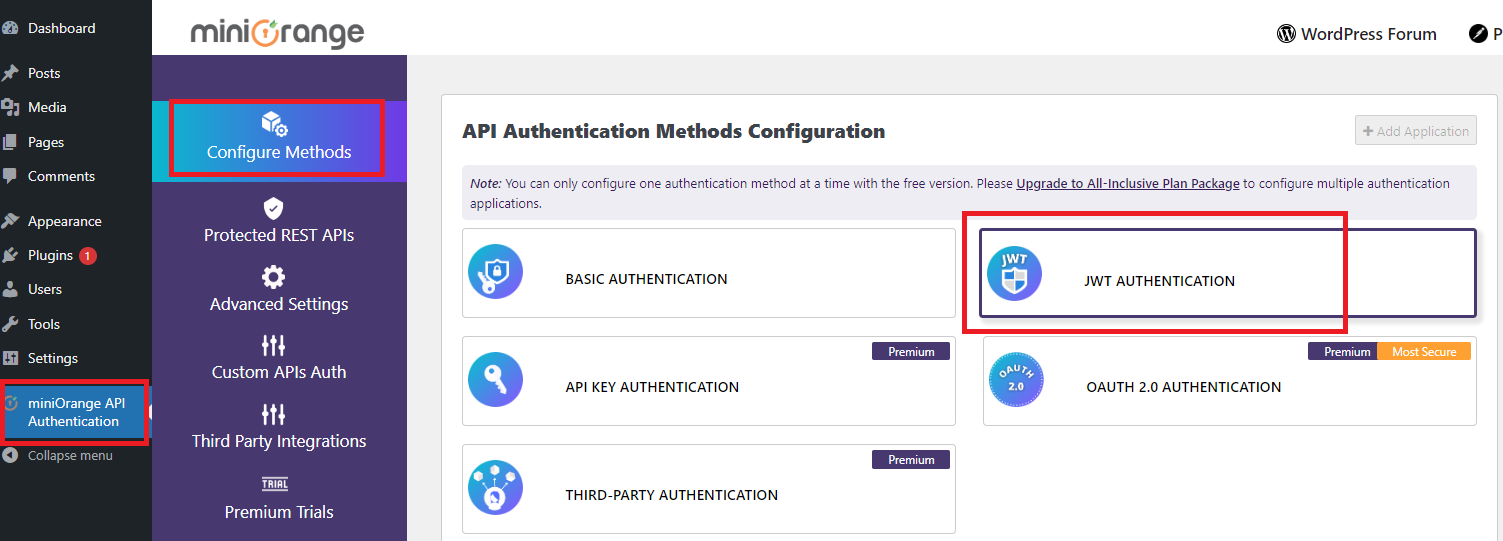
Once the installation is complete click on
miniOrange API Authentication
and click on
JWT Authentication
as shown in the image.
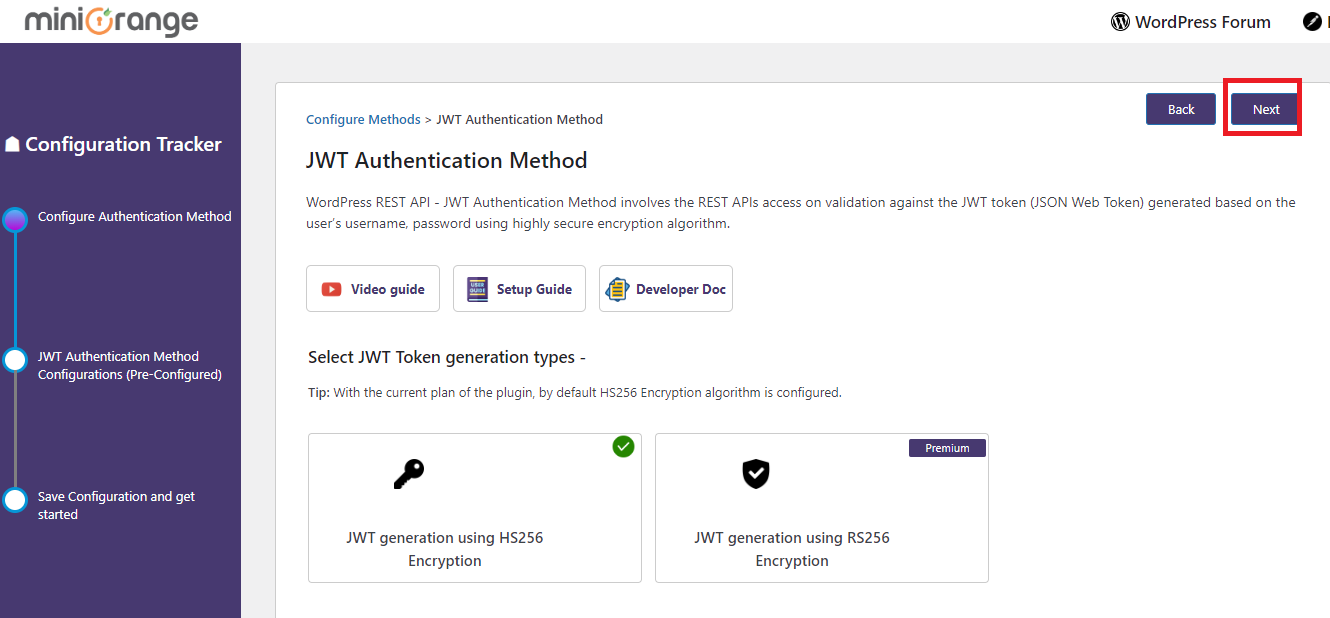
Step 6:
Click on
Next
button as shown in the image.
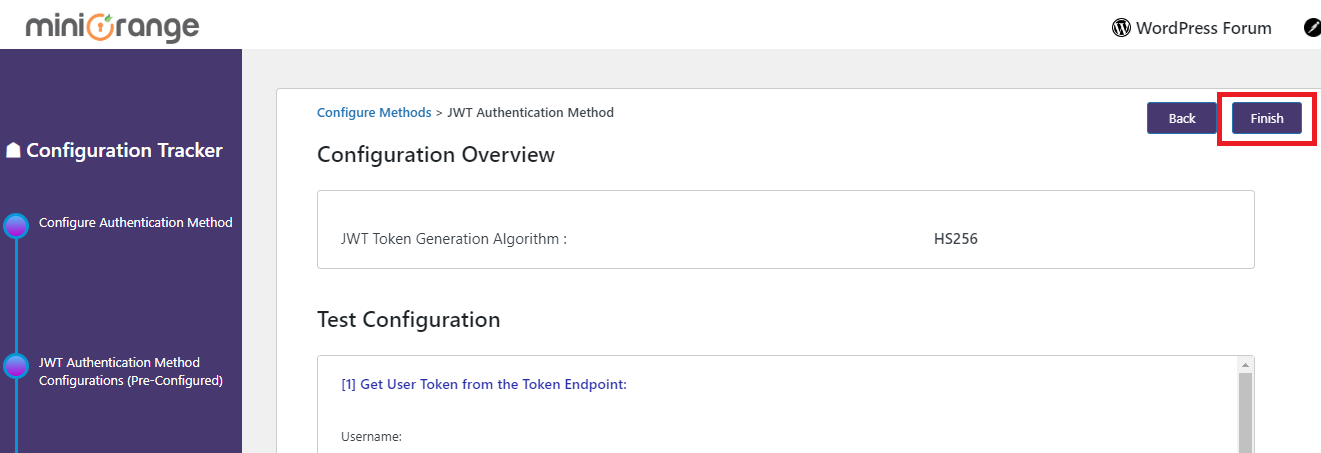
Step 7:
Click on
Finish
button as shown in the image.
Step 8:
In the
Settings – Extended Features
tab make sure that the Integration feature is turned on.
Step 9:
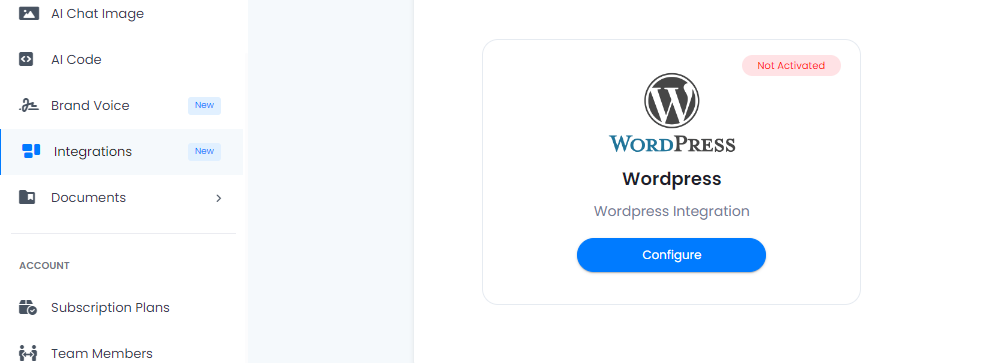
After it is turned on, it will appear in the side menu so that each user can configure their wordpress, click on
WordPress
.
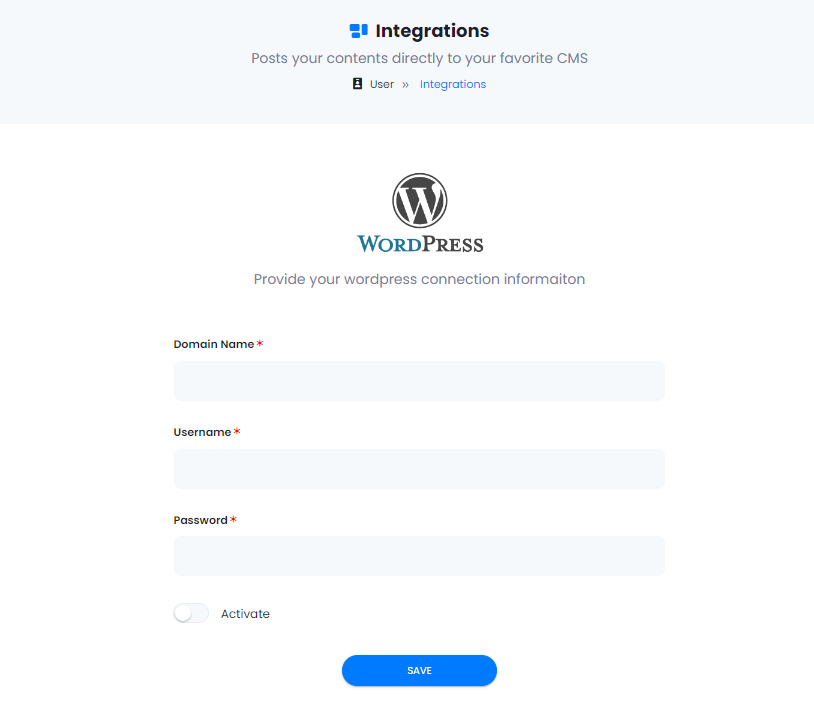
Step 10:
Enter your
Domain name
,
Username
and
Passowrd
, and don’t forget to
Activate
the feature and click on
Save
botton.
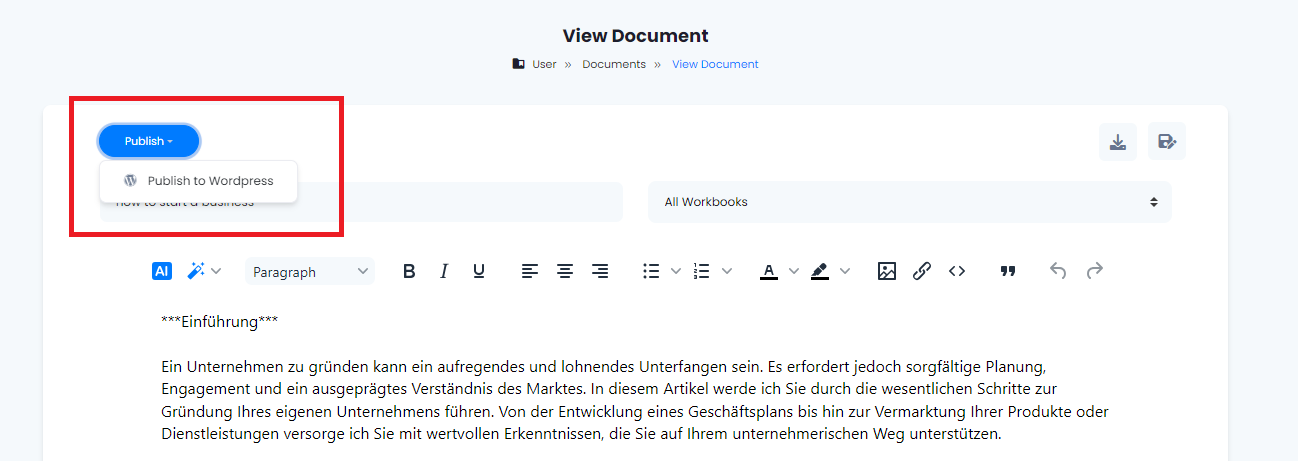
Step 11:
Go to your saved documents and you will see a
Publish
button, click on it and you are ready to post directly on your WordPress account.
Step 12:
Done.
Prev
The Dawn of GPT-4o: Blazing a Trail for Multimodal AI
Boost Local Search with Keywords
Next
Contact
Contact
Contact
Contact
Contact
Contact
Contact
Contact